Drawing Challenge: 3D Maze in Two Point Perspective
Published: Aug 23, 2024
In this challenge, I learned how to draw a maze with pen using two point perspective. Two point perspective is a fundamental art technique that involves drawing lines that point to two vanishing points on the horizon to create the illusion of 3D space on a 2D surface. It is a precise, systematic way to make drawings that look like real scenes with depth. I learned about this drawing challenge in an excellent video by a Youtuber named Marc Brunet. The video goes over a progression of 30 exercises to improve one's drawing fundamentals:
This exercise caught my eye in particular because I thought it seemed like a great step on the path to becoming a more intermediate artist. It represents moving on from drawing a single subject and simple forms like boxes to an elaborate scene of differently shaped overlapping rectangles at different depths. It is still approachable though because it is made up of consistent rectangular volumes with nice straight lines. So, it seems like a great exercise to level up my art skills. I also think mazes are fascinating to look at so I was excited to make one.
Marc’s 30 days of drawing video above doesn’t have specific or detailed instructions. The two point perspective part is straightforward (all of the lines you draw are either vertical or pointed towards one of your two vanishing points), but I still felt a little overwhelmed without some more clarity on how to make a maze. I looked for other resources for more detailed instructions and found this tutorial video from "Circle Line Art School":
This video tutorial teaches you how to draw a 3D maze in two-point perspective step-by-step. The steps are as follows:
- Draw a horizon line and two vanishing points
- Draw two lines from your vanishing points to the bottom center of the page to establish the bottom perimeter of your maze
- Draw two more lines from your vanishing points to create a square frame perimeter for your maze
- Fill in the square with a 2D maze that is drawn in two point perspective respective to your vanishing points.
- Give the outline of the maze a “double thickness” to draw the tops of your maze’s walls. In other words, add parallel lines to all lines and connect them at the corners.
- Draw a vertical line at the bottom base of the square. Add lines from the bottom to the vanishing points to establish your maze’s wall depths.
- Add vertical lines to all corners to create a sense of depth to the maze. This is the most satisfying part.
- Add in any bottoms of the walls that are missing, pointing them at your vanishing points.
- Shade the walls to create a sense of lighting and depth.
This tutorial video is also a bit unclear. I wasn’t sure how the wall dimensions were supposed to change as you moved closer up the page towards the vanishing points. There didn’t seem to be very precise ways of measuring out your wall dimensions in this tutorial, so I had to use my intuition. I wasn’t sure how to be creative and make my own maze either, so I looked for resources on building 2D mazes and was surprised to get unclear results. I would have thought there would have been more systematic, algorithmic ways to make mazes on paper, but I couldn’t find any satisfyingly easy ways to make a 2D maze. It seems like most people do a trial by error kind of approach, creating the correct path through the maze and then filling the rest in with interesting looking dead ends.
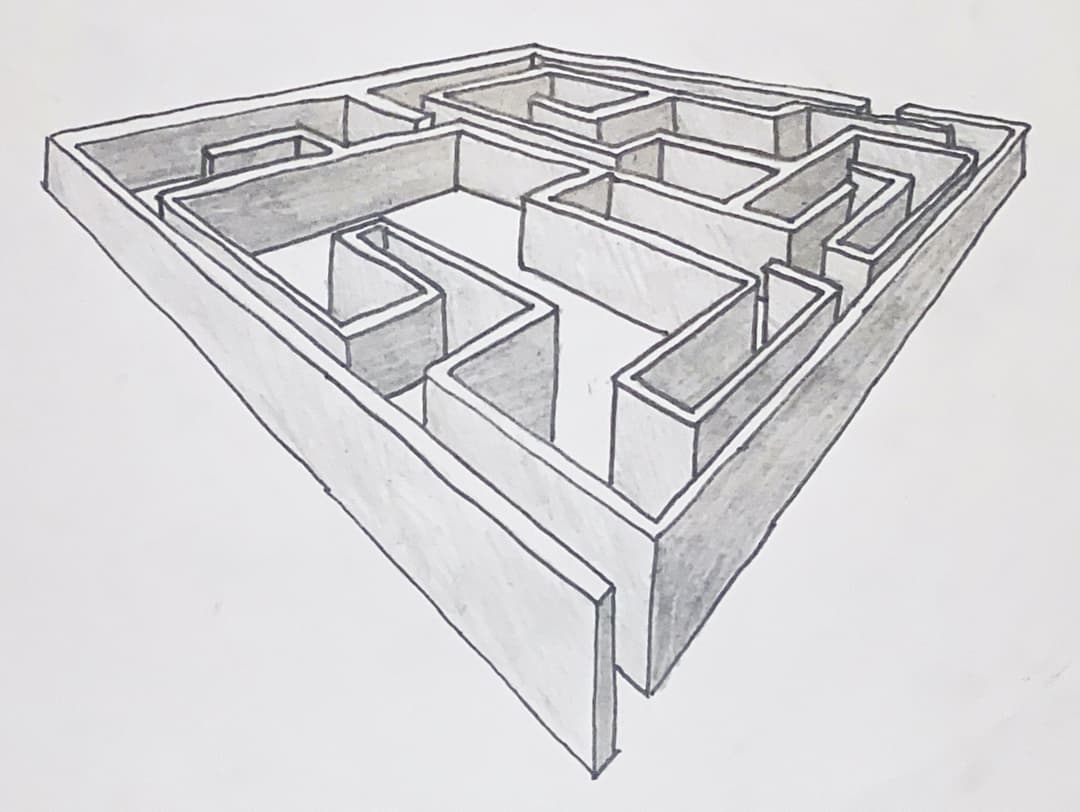
I used a pencil to lay out the maze with trial and error and then drew with pen on top of it to make this drawing. I had to use a pencil and eraser because making a maze in two point perspective will lead to mess-ups and almost always require many adjustments. I also opted to use a ruler to help me draw straight lines pointed perfectly at my vanishing points. Drawing a maze freehand with pen without these tools seems extremely difficult. The shading is also difficult with pen. I still have trouble creating gradient values with pen drawings. I will learn a shading technique called hatching in the future to improve my shading for pen drawings. So, for this particular drawing I chose to shade it with pencil.
I am glad I took on this art challenge. It has helped me to think about and draw more complex 3D forms. This takes you to a different level beyond drawing a single subject in 3D. This exercise lets you build a harmonious set of differently shaped volumes in relation to each other at different depths. It helps you build an intuition for perspective using the most fundamental 3D shapes to draw, rectangular prisms.
Mazes in general are fascinating to explore. In the process of doing this art challenge I learned about some creative ways artists have made 2D mazes, I learned how to draw a 3D maze with isometric grid paper, and I watched a time-lapse of someone creating a world record of over 1,000 square feet of hand-drawn maze. I have learned about algorithms for generating mazes and solving mazes with a computer. There are videos on physical hedge mazes, a maze solving competition, and a unique video on whether water can solve a maze. It is a fascinating subject to me. I am glad I explored mazes for this art challenge. I think it was a great exercise to develop my art skills and it was fun to explore this subject.